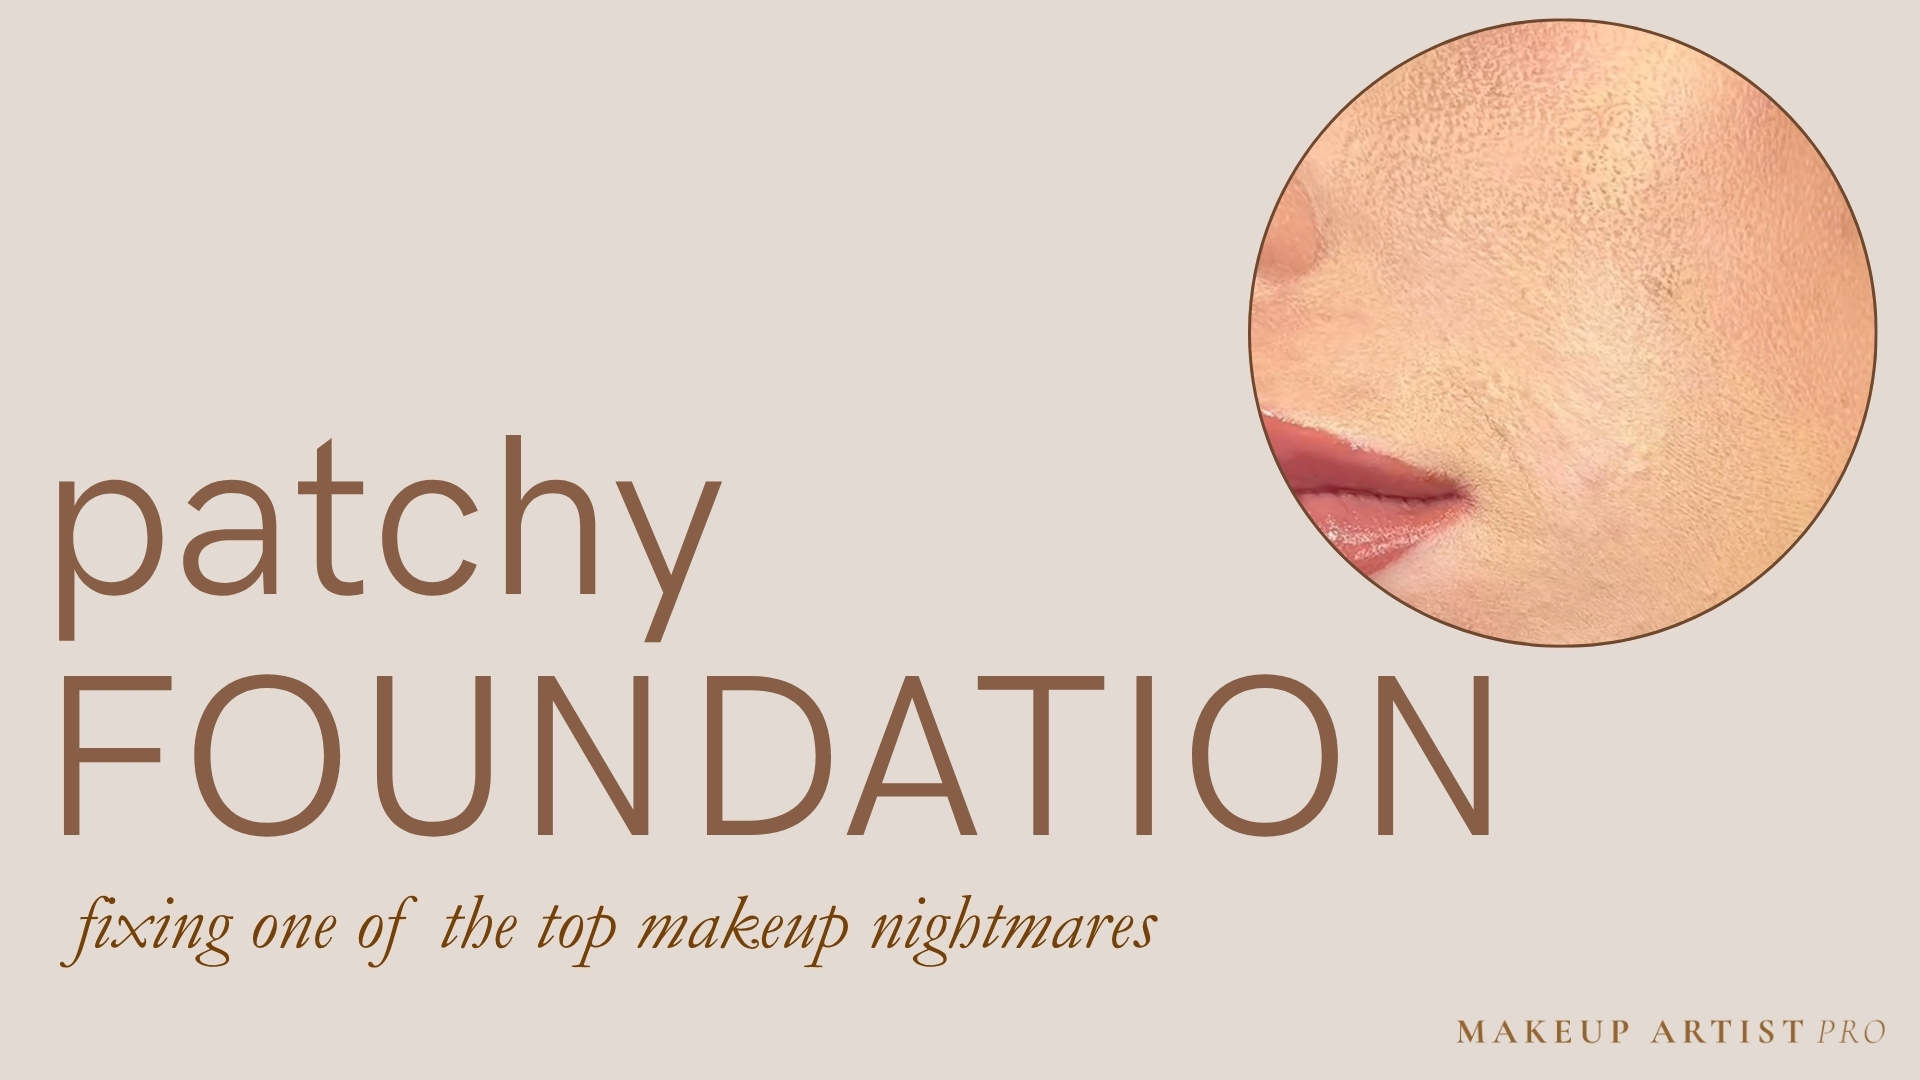
Foundation separating halfway through the day is frustrating. You put it on your face, and now it would apparently like to be somewhere else. Before you buy another bottle, check what is actually happening. Sliding coverage, little rolls of product, and makeup clinging to dry patches need different fixes. You probably do not need to replace your whole routine.
Put the brush down for a second. If the area is oily or sweaty, gently blot it. Tap the edges with a clean, barely damp sponge, then add a tiny bit of coverage to the gap. If every touch makes it worse, remove and redo that small patch. More powder is not always the answer, however tempting that compact looks.
Tell Separation, Pilling, and Dry Patches Apart
We tend to call everything patchy ‘separation,’ but take a closer look before adding anything. Look for moving foundation, little rolls of product, or makeup catching on flakes that were already there. Combination skin can give you more than one of these at once. Very generous of it.
If the colour has turned darker or orange but the makeup still looks smooth, head to the foundation oxidation guide. Makeup gathering in a smile line is creasing. Visible pores are just pores. Your foundation does not need to erase every sign that you have a face.
Find Your First Fix
Start with what you can see. Open a card for a quick fix and a link to the Base Makeup Troubleshooter with that problem already selected. The tool asks about your routine and suggests what to try next.
01 / While blendingLittle rolls of productEase up on the rubbing
Too much product or a layering combination can pill as you blend.
Try this: Try skipping an optional serum or primer next time, and press foundation on rather than buffing.
02 / Straight awayFoundation slides offLet your prep settle
Slippery skincare or too much foundation can leave coverage moving around.
Try this: Let skincare settle, then apply a lighter layer of foundation.
03 / A few hours laterA patchy noseGo lighter on the nose
Oil, sweat, glasses, and touching can all wear coverage away.
Try this: Use less foundation here next time. For a touch-up, blot gently before adding powder.
04 / Over dry areasEvery flake showsKeep coverage light
Foundation can catch on existing dryness, irritation, or rough patches.
Try this: Use your usual moisturizer and a little less coverage. Give irritated skin a break.
05 / After powderSmooth turns patchyLess powder, less pressure
A heavy dusting or repeated brushing can disturb the base underneath.
Try this: Tap excess powder off your brush and press a small amount only where needed.
06 / Around your mouthMakeup sits in linesSmooth before setting
Movement and product buildup can leave foundation gathered in a crease.
Try this: Use less coverage where skin folds, then gently smooth out any buildup before powdering.
Notice the step where things go wrong. If little rolls appear every time you add primer, start there. If the nose looks fine until you put your glasses on, check where they touch. A quick note on your phone is enough; no spreadsheet required. Keeping track makes it easier to spot a repeat problem instead of buying another product and hoping for the best.
Why Foundation Separates
Foundation has a lot to sit on: moisturizer, sunscreen, possibly primer, then your skin's oil and whatever the day throws at it. A combination can blend beautifully and still wear badly. Another can roll off when you rub it but look better when you press it on. The way you apply it matters as well as what is in the bottle.
The ‘water with water, silicone with silicone’ rule sounds wonderfully tidy. Unfortunately, makeup formulas did not get the memo. Plenty contain water, silicones, oils, and powders together. Water being first on two labels does not tell you whether they will layer nicely. An ingredient list cannot tell you how two finished products will wear together. Try them on your skin, keeping the rest of your routine the same and changing one layer at a time.
A 2024 skincare-pilling study found more pilling with circular and back-and-forth rubbing in the products tested. There are a lot of words in there, but the bottom line is: try pressing gently instead of rubbing the same spot over and over. Your foundation does not need a deep-tissue massage. It will not fix every case, but it is an easy thing to try before buying another primer.
“Water first on both labels guarantees compatibility.”
Tap to revealMatching labels is no guarantee. Try the products together on your skin and see how they wear.
“A primer can be optional.”
Tap to revealIf foundation wears better without it, you can leave it out. Primer needs to help, not just take up another step.
Try One Side With Primer, One Without
Keep your usual moisturizer, sunscreen, and foundation. Put primer on one side of your face and skip it on the other. Use about the same amount of foundation and apply it the same way on both sides. Check how it looks when you finish, then again later. You are looking for a noticeable difference, not conducting a laboratory trial in the bathroom.
If the side without primer keeps looking better, you can leave primer out. It has to earn its place, just like anything else in the routine. If the difference is tiny, try again another day and swap sides. One cheek might naturally be drier. Next time, change just one other thing, such as an optional serum or how much foundation you use. Keep your daytime sunscreen in the routine.
Prep Your Skin Without Overloading Your Base
Oily skin still deserves gentle cleansing and comfortable moisture. Trying to scrub it into submission can leave it irritated. Dry skin needs moisture, too; another layer of pigment will not make the flakes disappear. The American Academy of Dermatology's dry-skin advice is a useful starting point: gentle care and moisturizing. Start with products your skin already tolerates rather than introducing three new things on makeup day.
Please do not panic-exfoliate five minutes before leaving the house. Skip picking, vigorous scrubbing, and that new acid you have not tried yet. If your skin is stinging, sore, or irritated, give it a break. You can deal with the foundation later; making the skin angrier is unlikely to improve the situation.
For daytime makeup, apply sunscreen as directed and let it settle before adding foundation. There is no magic five-minute countdown for every formula. If you are spending time outdoors, reapply sunscreen every two hours and immediately after swimming or sweating. A morning layer under foundation does not cover the whole day.
If makeup pills over sunscreen, simplify optional skincare, change your blending technique, or try a different sunscreen texture. Do not solve pilling by using less sunscreen or blotting off a fresh sunscreen layer.
If the sunscreen itself is rolling off, stop and redo the affected area according to its directions. Do not assume whatever is left will give the intended protection. Foundation with SPF, powder, and setting spray do not replace your sunscreen routine. Starting that patch again is annoying, but covering the rolls with foundation does not solve it.
Apply Less, Then See What Needs Coverage
Start with a clean brush, fingers, or sponge. If your sponge is meant to be used damp, squeeze it out properly; damp is the goal, not a tiny water balloon. Old product buildup on a brush can make blending harder, so check the brush-cleaning guide if yours is overdue. Use a tool you already like before buying a new one to fix a problem that might just be too much product.
Start with comfortable skin
Cleanse gently, moisturize where needed, and apply daytime sunscreen as directed. Let those layers settle before adding makeup.
Use primer only if it helps
Use the product's recommended amount only where it helps. If it pills before foundation, address that layer rather than covering the rolls.
Start with less foundation
Apply a light layer where you want to even the skin. Press or stipple if repeated buffing starts lifting the layers beneath.
Add coverage to the spot
Let the first layer settle, then add a trace where needed. Concealer can cover a small area without thickening foundation everywhere.
Powder where you need it
Smooth product collected in creases, then apply a small amount of powder to areas that need it. Leave dry areas alone if powder emphasizes them.
Before you start, put a little foundation on a clean palette or the back of a clean hand. Pick up a small amount and work it evenly into the brush. Big dots straight onto the face make it surprisingly easy to apply far more than you meant to. Start where you want the most coverage, then use what is left on the brush for areas that need less. Add another small touch only where the first layer did not do enough.
Once the foundation looks even, stop blending. Another twenty passes are not a finishing technique if they keep lifting the same patch. Try pressing instead of buffing, and use less pressure. Also check whether the bottle says ‘shake well.’ Product settling in the bottle is a separate issue from foundation breaking up on your face.
Foundation application, step by step
Fix Foundation Separating on Your Nose, Cheeks, or Smile Lines
Nose and T-Zone: Reduce Buildup Before Adding Powder
Use what is left on your brush or sponge for the nose before adding another dot. Check the spots where glasses sit and where you tend to touch or wipe. Lighter coverage may look better there than a thick layer that keeps getting rubbed off. You can still cover redness selectively without giving your nose a whole extra coat of foundation.
When shine shows up later, press with a clean tissue or blotting paper. Do not rub. If the coverage underneath still looks good, leave it alone or add a little powder. If there is a bare patch, powder cannot bring the colour back; use the repair steps below. Keep up your sunscreen reapplication as directed, too.
Help your base last longer
Cheeks: Treat Dryness Differently From Shine
If foundation grabs onto flakes straight away, put the powder down. Try moisturizer your skin likes, less foundation, and less rubbing. A satin or moisturizing finish might feel better, but ‘dewy’ on the packaging is not a promise. See how it looks over your usual skincare before committing to a full bottle. If the same patch stays sore or flaky even without makeup, it needs attention beyond a different finish.
Matte foundation on dry skin
See how a matte finish looks over prepared skin. Keep coverage light; if your skin is irritated, makeup can wait.
Around the Mouth: Use Less Where Skin Moves
Smile lines move. That is rather the point. Keep foundation light there, and gently tap out any buildup before powdering. Adding more every time you spot a line tends to make it more obvious. Before setting, use a small clean brush to gently lift or blend away excess sitting in the crease. Keep the coverage beside it; you are thinning the buildup, not scrubbing off your face. For a blemish or a little redness, use concealer just on that spot instead of thickening the whole area.
Cover small spots without adding another full layer
See pinpoint concealing in action: small touches of coverage just where you want them.
Repair a Separated Patch Without Starting Over
You do not necessarily need to wash everything off and start again. Sure, it's a bit more annoying than getting everything on the first try, but we gotta work with what we have. Look at what is left, choose the closest option below, and work gently. If the patch gets worse with every attempt, stop layering and redo that small area instead. A two-minute reset can be less frustrating than ten minutes of trying to persuade a stubborn patch to behave.
Press away surface shine without dragging. Reassess in ordinary light. If the base remains smooth, leave it alone or press on a little powder where needed.
Try tapping the edge with a clean, barely damp sponge. If coverage is missing, add a tiny amount of foundation or concealer to the gap and blend its edges without rubbing the whole area.
Gently remove makeup from the affected area rather than layering over rolls or flakes. Restore moisturizer and daytime sunscreen as appropriate, let them settle, then reapply light coverage. If skin is irritated, stop.
If the base looked smooth until powder went on, try less powder before replacing the foundation. Tap excess off the brush, start with the places that get shiny, and check before adding more. You can always add a little. Taking a thick layer back off is rather less convenient.
Keep the touch-up kit simple: clean tissues, a clean tool, and the coverage product you already own. Setting spray can help the finish or wear of some formulas, but it cannot replace missing foundation. No need to add three new products to the basket just to fix one patch. Start small, check the result in normal light, and stop when it looks good enough.
Repair patchy foundation
When to Try a Different Formula
If lighter application and simpler prep keep giving you the same problem, trying another foundation makes sense. Ask for a sample if you can. Wear it over your usual sunscreen on an ordinary day, including your glasses, commute, and whatever else normally happens. Your hand is a lovely place for a swatch, but it does not do everything your face does.
If oily areas keep getting slippery, you could sample something with less slip or a long-wear finish. If dry patches feel uncomfortable, look for a finish that feels better on them. You do not have to choose matte just because you are oily, or dewy just because you are dry. In fact, Rare Beauty by Selena Gomez did a great job with True to Myself Natural Matte Longwear Foundation, a matte formula that can feel comfortable even on dry skin. Give it a moisturized base and try a sample first. A glowier finish can make texture more noticeable in some light, and formulas take different amounts of time to settle. Check both the finish and how it feels before deciding it needs extra powder. The matte vs dewy guide helps with finish; the shade-testing guide helps with colour.
A bottle that suddenly smells different, changes texture, or stays oddly separated after following the directions is a reason to check with the brand before using it again. Do not add water to ‘fix’ it. And if several products suddenly sting or the flaking will not settle, get advice about your skin. Sometimes the foundation is simply not the thing that needs changing.
Compare 4 top foundation formulas
Frequently Asked Questions
First check whether your skincare still feels wet or slippery. Try less foundation and press it on gently. Change one thing at a time; an immediate mess does not automatically mean water and silicone are fighting.
Oil, sweat, touching, tissues, and glasses can contribute. Try lighter coverage there and gently blot surface shine before powdering. If coverage has lifted, repair the gap rather than applying powder over it.
Try primer on one side and skip it on the other, keeping everything else the same. If the side without it keeps looking better, you can leave it out. There is no prize for having the most steps.
Follow the sunscreen's instructions and let its layer settle before makeup. There is no universal wait for every formula. Do not reduce the sunscreen amount or blot off a fresh layer to make foundation sit better.
It may improve a powdery appearance or wear with some formulas, but it cannot replace missing coverage. Start by identifying shine, a small gap, or a badly lifted patch, then blot, repair, or reset accordingly.
No. Cakiness describes a heavy or visibly textured buildup; separation describes uneven or missing coverage. They can overlap, especially after repeated touch-ups. Adding less product is a useful first test for both.
Your Next Makeup Day: Change One Thing
Pick one small change for your next makeup day: less foundation on the nose, gentler blending, less powder on dry cheeks, or skipping an optional primer. Keep everything else familiar. If you change five things at once, you may get a better result, but you will have no idea which one helped. A quick photo when you finish and another later can make the difference easier to see.
The Base Makeup Troubleshooter can help you work through what you are seeing. Try the suggestion that fits, see how your skin responds, and adjust from there. The goal is makeup that behaves better through your day. Pores and smile lines are allowed to come along.
Less panic, a little less product, and one change at a time.