Every eyeliner tutorial you have ever watched was probably designed for someone with visible lid space. That is why your wing disappears into your crease, your cat eye looks crooked, and your liner transfers onto your upper lid before you even leave the house. You do not need steadier hands or better products — you need techniques that were built for hooded eyes from the ground up. This is the guide that gives you seven of them, step by step, so you can pick the ones that fit your face and stop fighting your anatomy.
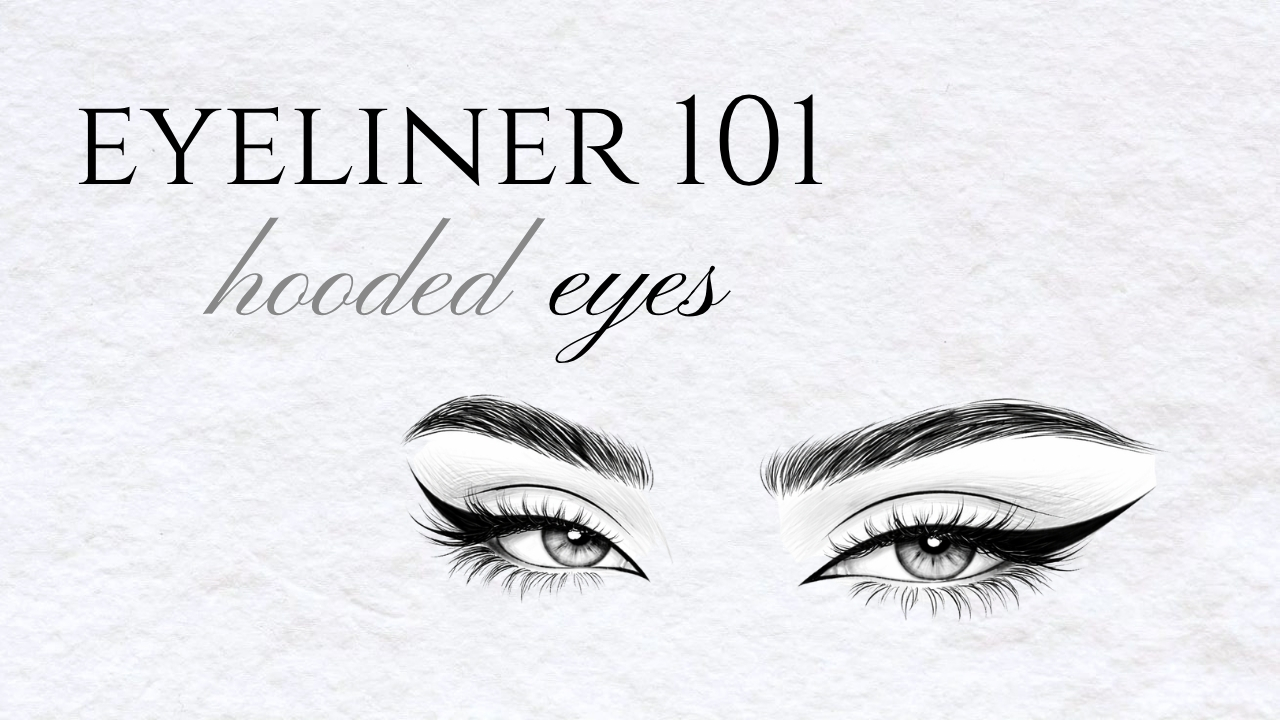
How to Tell If You Have Hooded Eyes
Hooded eyes have a fold of skin that partially or fully covers the crease when the eye is open. Look straight into a mirror. If your crease disappears behind that fold — or if you can barely see your eyelid between your lash line and your brow bone — you have hooded eyes. The hood can cover the entire lid or just the outer corner, and it can appear at any age. Some people are born with it, others develop it as the brow area loses volume over time.
Hooded eyes are incredibly common. They appear across every ethnicity, age group, and gender. Blake Lively, Jennifer Lawrence, Taylor Swift, and Emma Stone all have some degree of hooding. So do most people over 40, because skin naturally loses elasticity around the eyes. The point is this: hooded eyes are not a flaw that needs correcting. They simply require a different approach to eyeliner application. Not sure if your eyes are hooded, almond, or downturned? Our guides on eyeliner for almond eyes and eyeliner for downturned eyes each open with a visual identification method that can help you confirm your shape.
The single most important shift in thinking: always apply and check your eyeliner with your eyes open, looking straight ahead in the mirror. What you see with your eyes open is what the world sees.
Take our free Eye Shape Identifier quiz to confirm your shape in under a minute, then follow the techniques built for it. If you are hooded plus almond or downturned, the quiz will tell you, and the right guide is one tap away.
The 3 Non-Negotiable Rules for Hooded Eye Eyeliner
Before learning any technique, these three rules apply to every single one. Skip them and nothing else in this article will work properly.
Hooded eyes create skin-on-skin contact that causes transfer and smudging within minutes. Apply an eyeshadow primer to every part of your lid that your eyeliner will touch — including the hood itself. The primer creates a barrier that stops oil and friction from breaking down your liner. The Urban Decay Eyeshadow Primer Potion is bulletproof for this, or the Milani Eyeshadow Primer at a third of the price.
Close your eyes only to draw the line along your lash line. For everything else — the wing angle, the thickness at the outer corner, the overall shape — keep your eyes open and look straight ahead. The crease folds differently when your eyes are closed, so a wing that looks straight with closed eyes will bend or disappear when you open them.
Pulling the outer corner taut to get a smoother canvas is the most common mistake. When you release, the skin springs back, and the wing lands in a completely different position. Apply to relaxed skin, look straight ahead, and build slowly. It takes more patience, but the result is accurate every time.
Technique 1: The Modified Wing for Hooded Eyes
The classic winged eyeliner fails on hooded eyes because the wing gets eaten by the crease fold. The fix is simple: you draw the wing at a steeper angle and extend it above where the fold sits, so it remains visible when your eyes are open.
What you need: A felt-tip pen liner or fine-tip liquid liner. The NYX Epic Ink Liner or the Stila Stay All Day Waterproof Liquid Eyeliner both have tips thin enough for this.
Step-by-step:
- Map the wing first. With your eyes open, look straight ahead. Place the liner tip at the outer corner of your eye and draw a short line angled upward toward the tail of your eyebrow. The line should sit above the crease fold — check by blinking. If the line disappears into the fold, angle it steeper.
- Connect to the lash line. From the tip of that wing, draw a line back toward your upper lash line, meeting it at roughly the point above your pupil. This creates a triangle.
- Fill the triangle. Color in the space between the two lines.
- Line the upper lash line. Starting from the inner corner, draw a thin line along the lash roots. Keep it thinnest at the inner corner and gradually thicken it as you approach the outer corner where it meets the wing.
- Check with eyes open. The wing should be visible above the fold as a clean, upward-pointing flick. If it is not, extend the tip higher.
Pro tip: The wing will look exaggerated with your eyes closed — that is correct. Hooded eyes require a wing that looks dramatic when the eye is shut but proportional when open.
Watch these creators demonstrate the technique:
Technique 2: Bat Wing Eyeliner
The bat wing is the single most important eyeliner innovation for hooded eyes. Popularized by celebrity MUA Katie Jane Hughes, this technique looks like a normal wing when your eyes are open, but forms a bat wing shape when they are closed. It was designed specifically for lids where the crease eats a traditional wing.
Why it works: Instead of drawing a wing that extends past the outer corner (where the fold covers it), you bring the liner up into the crease itself, creating a shape that stays visible through the fold.
Step-by-step:
- Line the upper lash line. Use a thin line from the inner corner to the outer corner.
- With your eyes open, mark the wing tip. Place a small dot where you want the wing to end — above and beyond the outer corner, angled toward the brow tail.
- Close your eye. You will see the fold of skin now. Draw a line from the tip of the wing down into the crease, connecting it to the liner on your lash line. This creates a triangular shape that follows the curve of the crease.
- Fill in the shape. Color in the triangle. It will look like a bat wing or a checkmark with your eye closed.
- Open your eye. The crease fold hides the middle section, and what remains visible is a clean, sharp wing.
The key insight: You are essentially drawing the wing in two pieces — one above the crease fold and one below it — and the fold connects them visually when the eye is open.
See the bat wing technique in action:
Technique 3: Puppy Liner for Hooded Eyes
Puppy liner is the opposite of a cat eye. Instead of flicking the wing upward, you angle it slightly downward, following the natural curve of the lower lash line. On hooded eyes, this works beautifully because the downward angle avoids the crease entirely — the wing sits below the fold, not through it.
Why it works for hooded eyes: The crease fold covers upward-angled wings. A downward-angled puppy wing sits in the outer corner area below the fold, so it stays completely visible.
Step-by-step:
- Line the upper lash line from inner to outer corner, keeping the line thin.
- At the outer corner, extend the line slightly downward — following the natural curve of your lower lash line, not lifting upward. The extension should be short, about 3-5mm.
- Thicken the outer third. Go back over the last third of the upper lash line, making the line slightly thicker to create a gradual build-up toward the downward flick.
- Optional: softly line the outer third of the lower lash line with the same liner or a matching shadow on an angled brush, then blend the two lines together at the outer corner.
Best for: Round hooded eyes, anyone who finds upward wings consistently disappear, fans of Korean beauty looks, and anyone who wants a softer, more youthful effect.
Watch how the pros create puppy liner on hooded eyes:
Technique 4: Tightlining and the Waterline Lift
Tightlining is the most underrated eyeliner technique for hooded eyes. Instead of drawing a visible line on top of your lash line, you push liner between the individual lash roots on the upper waterline. The result is lashes that look thicker and darker at the base — with zero visible liner to smudge or transfer onto your hood.
The waterline eye technique — credited to MUA Doniella Davy and trending heavily in 2026 — takes this a step further. You line both the upper and lower waterlines at the very root of the lashes, creating a subtle lift to the eye without needing any lid space at all.
What you need: A waterproof pencil liner is essential here — liquid and felt-tip liners are too wet for the waterline. The Urban Decay 24/7 Glide-On Eye Pencil is the standard for tightlining because it is creamy enough to glide on the waterline but sets completely waterproof within seconds.
Step-by-step for tightlining:
- Gently lift your upper eyelid with one finger (lift the lid, not the outer corner).
- Look down into a mirror — a handheld mirror below your face works best.
- Press the pencil tip into the spaces between your upper lashes, wiggling it side to side. You are not drawing a line on top of the lash line — you are filling the gaps between the roots.
- Work from the outer corner inward in small sections.
- Blink a few times and check — you should see darker, thicker-looking lashes but no visible line of eyeliner.
Step-by-step for the waterline lift (2026 trend):
- Complete the tightlining steps above for the upper waterline.
- Line the lower waterline — the wet inner rim of the lower lid — with the same pencil. Use a nude or beige pencil here instead of black to open up the eye, or use black for a more dramatic lifted effect.
- The combination of upper and lower waterline color creates a frame around the iris that lifts the entire eye — no wing required.
See the technique demonstrated:
Technique 5: The Smokey Smudge (No Wing Required)
If precision liner stresses you out, the smokey smudge is your answer. This technique uses a pencil or gel liner smudged out with a brush to create a soft, diffused liner look. There is no sharp wing to worry about — the softness of the smudge means slight asymmetry looks intentional, and transfer from the hood actually helps the smokey effect.
What you need: A soft pencil or gel liner — the Bobbi Brown Long-Wear Gel Eyeliner with a small angled brush is ideal. For a budget option, any creamy pencil liner works.
Step-by-step:
- Apply a pencil or gel liner along the upper lash line. Do not worry about perfection — a slightly wobbly line is fine.
- Immediately smudge it outward and upward using a small smudge brush, a flat shader brush, or even a cotton swab. Blend the top edge so it fades from dark at the lash line to soft and diffused as it reaches the crease.
- Smudge the outer corner slightly upward and outward — this creates a subtle lifted effect without a defined wing.
- Optional: line the outer third of the lower lash line with the same product and smudge it down and outward, blending it to meet the upper corner.
- Set it with a matching dark eyeshadow pressed on top with a flat brush. This prevents the smudge from continuing to migrate and locks the look in place.
Why this works for hooded eyes: Transfer and smudging — the biggest enemies of hooded eye liner — actually enhance this look. The more the product softens through the crease, the smokier it gets. You are working with the hood instead of against it. If you want to take this further into a full smokey eye, our complete smokey eye tutorial includes a dedicated section on adapting the gradient for hooded eyes.
See it in action:
Technique 6: Reverse Liner (The 2026 Lower Lash Lift)
Reverse liner — also called the reverse cat eye — is one of the biggest eyeliner trends of 2026, and it is practically custom-made for hooded eyes. Instead of lining the upper lid (where the hood covers everything), you focus all the definition on the lower lash line. This avoids the disappearing-lid problem entirely.
Step-by-step:
- Skip the upper lash line. Leave it bare, or apply only a thin tightline between the lash roots.
- Line the lower lash line from the outer corner to the middle of the eye using a pencil or felt-tip liner. The line should be thickest at the outer corner and taper to nothing toward the center.
- Extend a small wing from the outer corner of the lower lash line, pointing slightly downward and outward. This is the reverse of a traditional upper wing.
- Smudge the line slightly with a small brush to soften the edge.
- Finish with mascara on upper and lower lashes to tie the look together.
Best for: People with severely hooded lids where nothing on the upper lid stays visible, anyone over 50 looking for a modern lifted look, and anyone who wants bold definition without fighting the crease.
Technique 7: Floating Liner (Visible Above the Crease)
Floating liner places the eyeliner above the natural crease, on the visible part of the lid that the hood does not cover. When done right, it creates the illusion of a larger eye area and makes a graphic statement. This is a 2026 favorite for editorial and everyday-bold looks.
Step-by-step:
- Find your visible zone. With eyes open, look straight ahead. The area between your crease fold and your brow bone is where this liner will sit.
- Draw a thin line along the top edge of the crease fold — the line where the hood meets the visible lid. Follow the natural curve of your eye.
- Optionally extend a small flick at the outer corner, angling upward.
- You can tightline the upper lash line as well to connect the definition at the lashes with the floating line above — or leave the lash line bare for a more graphic, editorial effect.
Pro tip: A dark eyeshadow on a flat brush gives a softer version of this look. A liquid liner gives a sharp, graphic version. Start with shadow until you are comfortable with the placement.
Which Technique Is Right for You?
If you are a complete beginner with hooded eyes, start with tightlining. It is the easiest, most forgiving technique, and it makes every other eye look better regardless of what you layer on top. Once you are comfortable with tightlining, try the smokey smudge or the puppy liner — both are very forgiving of imperfect lines. The modified wing and bat wing require more precision but deliver the most dramatic results.
For mature hooded eyes — where the hood has increased over time — tightlining, the waterline lift, the reverse liner, and the smokey smudge tend to produce the most flattering results. Heavy liner on the upper lid can visually weigh down an aging eye, so lighter, more strategic placement wins.
Best Eyeliner Products for Hooded Eyes
The formula matters as much as the technique on hooded eyes. The skin-on-skin contact from the hood will break down anything that is not smudge-proof and fast-setting.
Why they work: Felt tips dry almost instantly, leaving a thin film that resists transfer. The rigid tip provides precision for wings and bat wing shapes.
Best for: Modified wing, bat wing, floating liner. Any technique requiring crisp, thin lines.
Top picks: The NYX Epic Ink Liner has a flexible brush tip that is more forgiving for beginners. The Stila Stay All Day Waterproof Liquid Eyeliner has a stiffer felt tip that delivers the most precise control. For sensitive eyes, the Physicians Formula Eye Booster Eyeliner includes a lash-boosting serum and a super slim tip.
Application tip: Wait 10 seconds after each stroke before opening your eyes fully. This gives the formula time to set so it does not transfer to the hood.
Why they work: Gel formulas glide on smoothly and give you a few seconds of working time before they set — enough time to smudge and shape, but once set they lock in place.
Best for: Smokey smudge technique, thick liner looks, anyone who prefers a brush over a pen.
Top picks: The Bobbi Brown Long-Wear Gel Eyeliner has been the industry standard for 20 years — it is genuinely waterproof and does not budge once set. For a professional-grade option at half the price, the Inglot AMC Eyeliner Gel is the same formula MUAs use backstage at fashion week.
Application tip: Use a small angled brush with a short, firm bristle. A floppy brush makes gel liner impossible to control. Warm the brush in the gel for 2-3 seconds before lifting — cold gel skips.
Why they work: Pencils are the safest option for waterline and tightlining work — they are less irritating than liquids and easier to control in the tight space between the lashes.
Best for: Tightlining, waterline lift, reverse liner, puppy liner. Anywhere you need to get close to the eye itself.
Top picks: The Urban Decay 24/7 Glide-On Eye Pencil is the gold standard — creamy application that sets fully waterproof. For a budget pick, the NYX Retractable Eye Liner performs well above its price point.
Critical note for hooded eyes: Pencil on the upper lash line (not tightlined, but drawn on top) is the most likely to transfer. If you use pencil on the upper lid, set it immediately by pressing a matching dark eyeshadow into the wet pencil with a flat brush.
Common Mistakes That Ruin Eyeliner on Hooded Eyes
Watch what NOT to do — this MUA breaks down the most common hooded eye don'ts:
"Thick eyeliner makes hooded eyes look more dramatic and open."
Tap to revealThick liner on the upper lid eats into the tiny amount of visible lid space hooded eyes have. This makes the eye look smaller, not bigger. Thin lines and tightlining preserve lid space while still defining the eye.
"You should apply eyeliner with your eyes closed for the smoothest line."
Tap to revealOn hooded eyes, the skin shifts significantly between open and closed positions. A perfect line drawn on a closed eye will distort, crease, or transfer when the eye opens. Always check your liner with eyes open — that is the only position that matters.
"Waterproof formula is optional — regular eyeliner works fine if you set it with powder."
Tap to revealHooded eyes create constant friction between the lid and the hood. Regular formulas — even set with powder — will transfer within hours. Waterproof or long-wear formulas are non-negotiable for hooded eyes, not a luxury.
"People with hooded eyes should avoid eyeliner altogether."
Tap to revealHooded eyes can wear every style of eyeliner beautifully. The techniques just need to be adapted — steeper wings, tightlining, bat wing shapes, and strategic placement. The right technique for your eye shape makes all the difference.
Eyeliner Tips for Mature Hooded Eyes
As we age, the skin around the eyes loses collagen and elasticity. A lid that was slightly hooded at 25 can become significantly more hooded at 50. Here are specific adjustments for mature hooded eyes:
Focus on the lower half of the eye. Heavy liner on the upper lid weighs down a mature eye. Tightlining, the waterline lift, and the reverse liner all define the eye from below, creating lift instead of heaviness.
Use brown instead of black. Brown liner creates definition without harshness. On mature skin, black liner can look severe and draw attention to fine lines. Dark brown or espresso shades look softer and more natural.
Keep wings short and steep. If you insist on a wing, keep it very short (2-3mm) and angle it steeply upward. A long wing on mature hooded skin can look uneven because the skin texture at the outer corner is less smooth.
Avoid lining the lower waterline with dark liner. On mature eyes, dark lower waterline liner can make the eyes look smaller and tired. Use nude or champagne-colored liner on the lower waterline instead to brighten and open the eye. Pairing a soft brown liner with well-shaped brows creates a naturally lifted frame around the eyes — our eyebrow shapes guide covers the best arch for every face shape.
Set everything. Mature skin tends to be drier and more textured, which means liner grabs unevenly. Set pencil liner with matching eyeshadow, and always use primer.
Watch these tutorials designed for mature hooded eyes:
Test Your Hooded Eye Eyeliner IQ
5 questions. How well do you really know this stuff?
Frequently Asked Questions About Eyeliner for Hooded Eyes
It depends on the look you want. For a sharp wing, the bat wing technique is built specifically for hooded eyes — it stays visible when the eye is open. For everyday definition, tightlining gives the most natural result with zero transfer. For a soft, forgiving look, the smokey smudge actually benefits from the lid fold. Start with tightlining if you are a beginner.
Three things prevent smudging: primer, waterproof formula, and setting. Apply an eyeshadow primer to the entire lid and hood area. Use only waterproof or long-wear eyeliner — not regular formula. Set pencil liner by pressing a matching dark eyeshadow on top with a flat brush. For felt-tip liners, wait 10 seconds before opening your eyes fully to let the formula set.
Absolutely — you just need to modify the technique. Draw the wing at a steeper angle so it sits above the crease fold, or use the bat wing technique where the liner goes through the crease and reconnects above it. The key is mapping the wing with your eyes open, not closed. If the wing disappears when you open your eyes, angle it steeper and extend it higher.
Waterproof felt-tip pen liners are the most versatile — they dry fast, resist transfer, and provide the precision needed for modified wings and bat wings. For tightlining and waterline work, waterproof pencils are essential because they are safe to use on the inner rim. Gel liners work well for smokey looks. Avoid regular (non-waterproof) formulas entirely on hooded eyes.
Thick eyeliner on the upper lid can make hooded eyes look smaller because it covers the limited visible lid space. However, thin liner, tightlining, and techniques like the waterline lift actually open up hooded eyes. The trick is strategic placement — define the lash line without eating into the lid space. Avoid heavy liner all the way around the eye.
Focus on the lower half of the eye with tightlining, the waterline lift, or the reverse liner. Use brown instead of black for a softer effect. Keep any wings very short (2-3mm) and steeply angled. Avoid lining the lower waterline with dark liner — use nude instead to brighten. Always prime the lid and set everything with eyeshadow to prevent creasing on mature skin.
The Bottom Line: Your Eyes, Your Technique
Hooded eyes are not a problem to solve — they are a shape to work with. The difference between eyeliner that frustrates you and eyeliner that transforms you comes down to one thing: using a technique that was designed for your anatomy. You now have seven of them. Start with the easiest one — tightlining — and add complexity from there. Once you internalize the three rules (prime, eyes open, never stretch), every technique in this guide becomes doable.
Stop adapting your face to the tutorial. Adapt the technique to your face.