Every eyeliner tutorial you have ever followed was probably designed for almond or upturned eyes. That is why your wing droops, your cat eye sags at the outer corner, and the whole look makes your eyes appear heavier instead of more defined. The problem was never your skill — it was the technique. Downturned eyes need eyeliner approaches that work with the natural slope of the outer corner, not against it. This is the guide that gives you eight of them, from the easiest everyday look to the most dramatic lifted wing, so you walk away knowing exactly which technique fits your face and how to execute it.
How to Tell If You Have Downturned Eyes
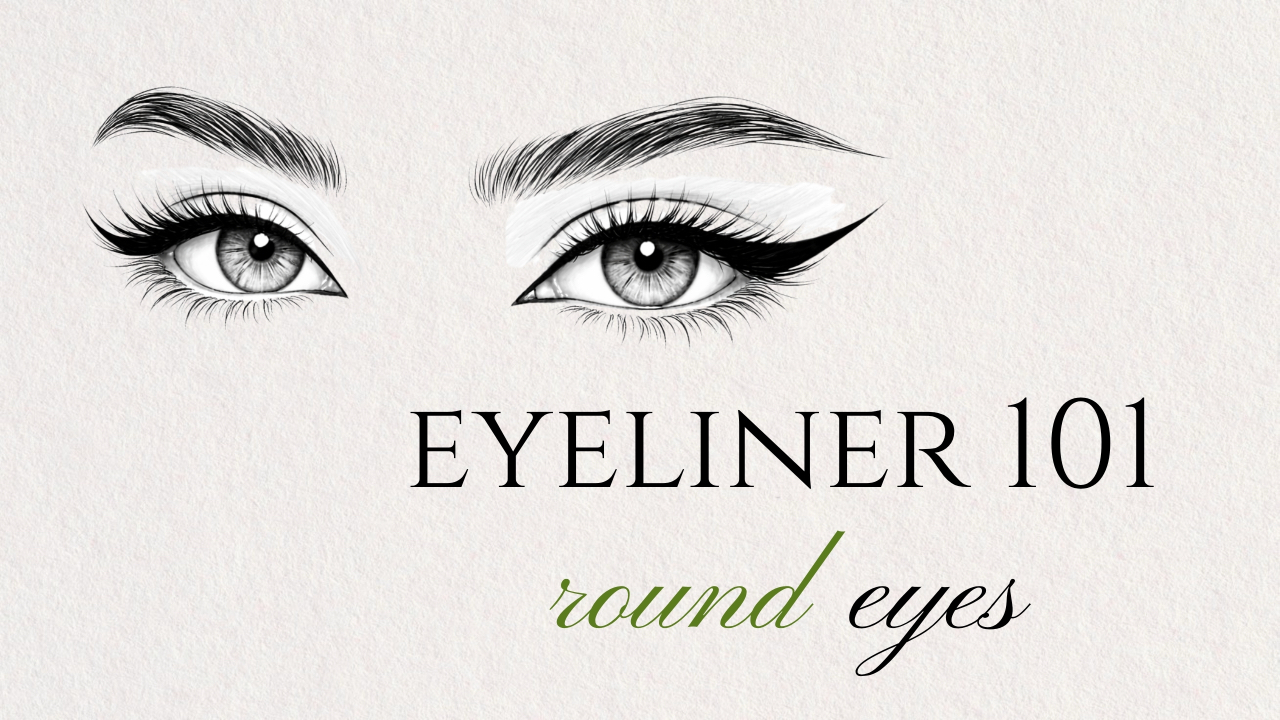
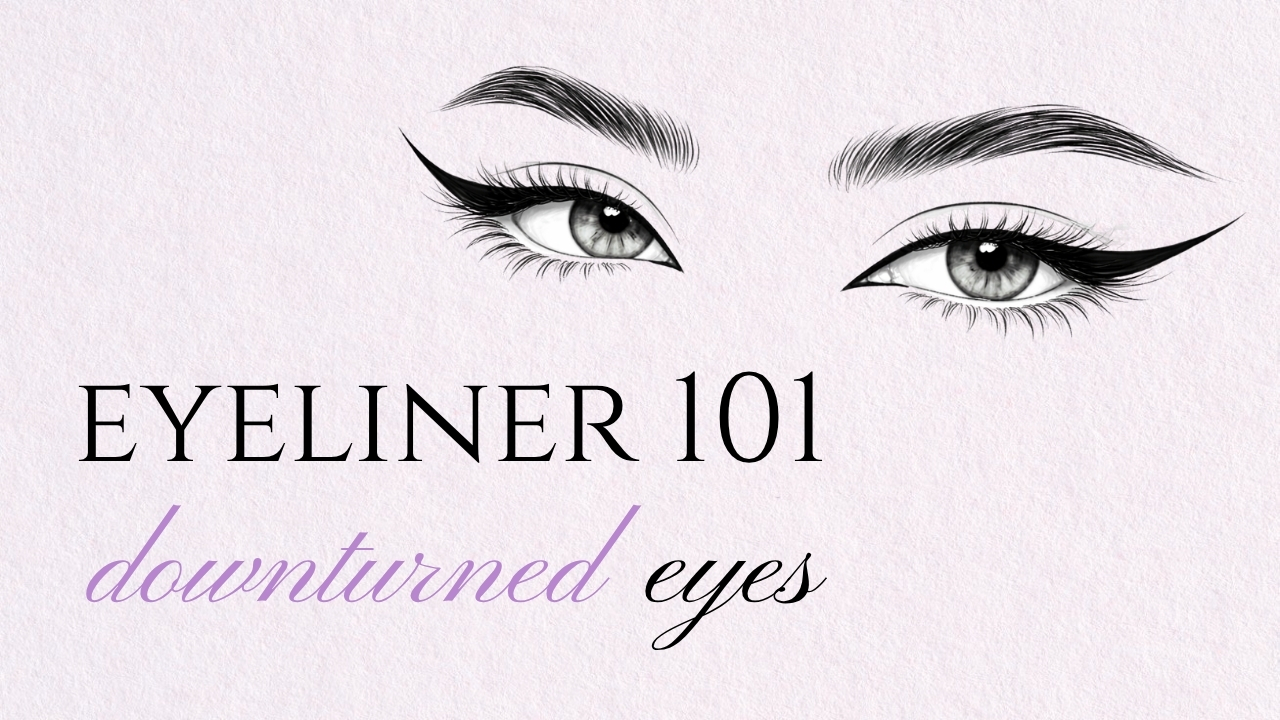
Downturned eyes have outer corners that sit lower than the inner corners. Look straight into a mirror and imagine drawing a perfectly horizontal line from the inner corner of one eye across to the outer corner. If the outer corner falls below that line, you have downturned eyes. If it sits above the line, your eyes are upturned. If the corners are roughly level, you likely have almond-shaped eyes.
Downturned eyes give a naturally soft, approachable expression — sometimes described as "bedroom eyes" or "doe eyes." The upper lash line curves gently downward at the outer edge, and the lower lash line may appear more prominent at the outer corner. This is one of the six most common eye shapes, appearing across every ethnicity and age group. Anne Hathaway, Marilyn Monroe, Katie Holmes, Camila Cabello, and Katy Perry all have downturned eyes. So does Jessica Alba.
The critical distinction: Downturned is about the angle of the outer corner. Hooded is about how much lid is visible. You can absolutely have both — hooded AND downturned eyes at the same time. Many people do. If that sounds like you, pay special attention to Technique 7 (Bat Wing Liner) later in this guide, which is designed for exactly that combination. If you think you might have hooded eyes instead of (or in addition to) downturned eyes, our eyeliner for hooded eyes guide has a visual identification method and seven techniques built for that shape. For almond eyes, see our eyeliner for almond eyes guide.
Downturned Eyes
Outer corners sit below the inner corners. The upper lash line slopes downward at the outer edge. Gives a soft, gentle expression. Eyeliner challenge: wings droop and follow the slope.
Upturned Eyes
Outer corners sit above the inner corners — a natural cat-eye shape. The upper lash line lifts at the outer edge. Wings practically draw themselves. Eyeliner challenge: can look too dramatic easily.
Hooded Eyes
A fold of skin covers part or all of the crease. Can occur with ANY corner angle — downturned, upturned, or level. Eyeliner challenge: liner transfers and wings disappear into the fold.
Take our free Eye Shape Identifier quiz to confirm your shape in under a minute, then come back for the lifting techniques below. If you are downturned plus hooded, the quiz will flag it so you can head straight to the bat wing technique.
The 3 Non-Negotiable Rules for Downturned Eye Eyeliner
Before learning any specific technique, these three principles apply to every single one. Skip them and the techniques will not deliver.
This is the single most important rule for downturned eyes. When applying liner along the upper lash line, stop at the point where the outer corner begins to slope downward — do NOT follow it around the corner. Following the natural curve is what makes your wing droop. Stop where the slope starts, then redirect upward.
Close your eyes only to draw the line along the lash roots. For everything else — the wing angle, the thickness, the shape — keep your eyes open and look straight ahead. The outer corner sits differently when your eyes are closed, so a wing that looks perfectly angled with closed eyes will tilt downward when you open them.
Downturned eyes are prone to transfer and smudging specifically at the outer corner, where the skin naturally folds over. Apply an eyeshadow primer to the entire lid area — especially the outer third. The Urban Decay Eyeshadow Primer Potion is the standard, or the Milani Eyeshadow Primer at a fraction of the price. Without primer, even waterproof liner will migrate within hours.
Technique 1: The Lifting Wing (The Essential Move)
The classic winged eyeliner fails on downturned eyes because most people follow the natural slope of the lash line when drawing the wing. The fix: you intentionally redirect the wing at a steeper upward angle, creating a visual lift that counteracts the downward slope.
What you need: A felt-tip pen liner with a fine tip. The NYX Epic Ink Liner has a flexible brush tip that is forgiving for beginners. The Stila Stay All Day Waterproof Liquid Eyeliner has a stiffer felt tip that delivers maximum precision.
Step-by-step:
- Line the upper lash line from inner corner to the outer third — keep the line thin. Stop at the point where your outer corner begins to turn downward. This is your pivot point.
- With your eyes open, map the wing. From that pivot point, draw a short line angled upward toward the tail of your eyebrow. Imagine a straight line from the outer edge of your lower lash line up toward the brow tail — that is your wing angle, roughly 45 degrees. The wing should be short to medium length, about 3-5mm.
- Connect back to the lash line. From the tip of the wing, draw a line back toward the upper lash line, meeting it at roughly the point above your iris. This creates a small triangle.
- Fill the triangle. Color in the space between the two lines.
- The straight-line test. Look down into a mirror. The wing should form a straight line, not a curved hook. If it curves downward at any point, that is the droop showing through — angle the wing tip higher.
Pro tip: Apply concealer one to two shades lighter than your skin tone directly underneath the wing with a small brush. This sharpens the line and amplifies the visual lift.
Watch these creators demonstrate lifting wing techniques for downturned eyes:
Technique 2: The Outer-Third Wing (Minimal Effort, Maximum Lift)
If full lash-line liner feels like too much, this stripped-back technique gives you 80 percent of the lifting effect with half the effort. You only line the outer third of the upper lash line, then flick it into a short wing. By skipping the inner two-thirds, you avoid weighing down the eye and focus all the definition exactly where downturned eyes need it.
Step-by-step:
- Start at the point directly above your pupil. Place your liner tip on the upper lash line at the center of the eye.
- Draw a thin line outward along the lash line, stopping at the point where the outer corner begins to slope down.
- Flick upward from that pivot point at a 45-degree angle — a short, quick stroke about 3-4mm long.
- Connect and fill. Draw a thin line from the wing tip back toward the lash line to close the triangle, then fill it in.
- Gradually thicken. The line should be thinnest at the center of the eye and thickest at the outer corner where it meets the wing.
Best for: Everyday wear, small eyes that do not want to be weighed down, beginners who want a lifting effect without the precision of a full wing.
Technique 3: The Cat Eye for Downturned Eyes
A traditional cat eye draws the wing from the very end of the outer corner. On downturned eyes, this pulls the wing downward. The fix: start the wing from a higher pivot point and use a thicker outer section to square off the drooping corner.
What you need: A liquid liner for precision. The Hourglass 1.5mm Mechanical Gel Liner has the thinnest gel tip available and is completely waterproof.
Step-by-step:
- Line the upper lash line from inner corner to the outer third, keeping the line thin and close to the lash roots.
- At the outer third, begin thickening the line. The outer third should be visibly thicker than the inner two-thirds. This added weight squares off the corner and counteracts the downward slope.
- For the wing, start from the lower lash line — not the outer corner. Place your liner at the outer edge of the lower lash line and draw upward toward the brow tail at a steep angle. This ensures the wing lifts away from the drooping corner.
- Connect the wing tip back to the upper liner. Fill in the triangle.
- Do NOT extend liner past the pivot point. The upper lash line liner should stop where the droop starts. The wing takes over from there.
The key insight: On downturned eyes, the cat eye wing must originate from below the outer corner and angle steeply upward. If you draw it from the end of the upper lash line, it follows the slope down.
Watch the cat eye technique adapted for downturned eyes:
Technique 4: Puppy Liner (Embrace the Downturn)
Every other technique in this guide fights the downward slope. Puppy liner leans into it. Originating from Korean beauty, puppy liner follows the natural downward curve of the outer corner instead of redirecting upward. The result is a soft, doe-eyed, youthful look that makes downturned eyes a deliberate aesthetic choice rather than something to correct.
Why it works on downturned eyes: Downturned eyes already have the natural shape that upturned and almond eyes have to fake for this look. You have a built-in advantage.
Step-by-step:
- Line the upper lash line from the inner corner to the outer corner, keeping the line thin and even.
- At the outer corner, follow the natural downward slope. Instead of flicking upward, extend the liner slightly downward, following the curve of your lower lash line. The extension should be short — 3-5mm.
- Thicken the outer third. Go back over the last third of the upper lash line, making it slightly thicker to create a gradual build toward the downward tip.
- Soften the lower lash line. Using a brown or matching pencil liner on an angled brush, gently line the outer third of the lower lash line and connect it to the upper liner at the outer corner. Smudge softly for a seamless blend.
- Optional: add aegyo sal. Apply a light shimmer or highlight to the inner half of the undereye area to enhance the youthful, wide-eyed puppy effect — a signature of the K-beauty version.
Watch the puppy liner technique in action:
Technique 5: Tightlining (Invisible Definition)
Tightlining is the most underrated technique for downturned eyes. Instead of drawing a visible line on top of the lash line — where it has to fight the outer-corner slope — you push liner between the individual lash roots on the upper waterline. The result is lashes that look thicker and darker at the base with zero visible liner to droop, smudge, or transfer.
What you need: A waterproof pencil liner — liquid and felt-tip liners are too wet for the waterline. The Urban Decay 24/7 Glide-On Eye Pencil is the gold standard for this because it is creamy enough to glide between lash roots but sets fully waterproof within seconds. For a budget pick, the NYX Retractable Eye Liner performs well above its price.
Step-by-step:
- Blot the upper waterline with a tissue. This removes moisture so the pencil adheres better.
- Gently lift your upper eyelid with one finger — lift the lid itself, not the outer corner.
- Look down into a handheld mirror placed below your face.
- Press the pencil tip into the spaces between your upper lashes, wiggling it side to side. You are filling the gaps between the roots, not drawing a line on top of the skin.
- Focus on the outer two-thirds. For downturned eyes, concentrate your tightlining from the center of the eye outward. This creates definition where it is needed most without adding weight to the inner corner.
- Blink a few times and check. You should see darker, thicker-looking lashes but no visible line of eyeliner.
For additional lift: Use a nude or beige pencil on the lower waterline. This optically extends the white of the eye and creates an overall opening effect. The combination of dark upper tightline and light lower waterline lifts downturned eyes subtly but noticeably.
Technique 6: The Smokey Smudge (Soft and Forgiving)
If precision liner stresses you out, the smokey smudge is your answer. You apply a pencil or gel liner along the lash line and smudge it outward with a brush. There is no sharp wing to worry about — the softness of the smudge means slight asymmetry looks intentional. The key for downturned eyes: always smudge upward and outward, never downward.
What you need: A soft pencil or gel liner and a small smudge brush. The Bobbi Brown Long-Wear Gel Eyeliner with the e.l.f. Small Angled Brush is the classic combination. For a budget alternative, the Maybelline Eye Studio Lasting Drama Gel Liner does the job.
Step-by-step:
- Apply a pencil or gel liner along the upper lash line. Do not worry about perfection — a slightly messy line is fine because you are about to smudge it.
- Immediately smudge upward and outward using a small smudge brush, a flat shader brush, or a cotton swab. Blend the top edge so it fades from dark at the lash line to soft and diffused above. For downturned eyes, angle the smudge direction toward the brow tail — this creates lift.
- At the outer corner, smudge steeply upward. Do not let the smoke drift downward along the natural slope. Push it upward toward the temple.
- Optional: softly line the outer third of the lower lash line with the same product and smudge it downward slightly, then blend where the upper and lower meet at the outer corner.
- Set the smudge with a matching dark eyeshadow pressed on top with a flat brush. This locks the look in place and prevents further migration.
Why this works for downturned eyes: A smudged look is inherently forgiving. You control the direction of the smoke, and by consistently pushing it upward, you create a lifted haze around the outer corner that counteracts the droop without needing any precision. To build this into a full smokey eye, layer eyeshadow on top of the smudged liner using the gradient technique — darkest at the lash line, fading lighter as it moves up.
See the smokey smudge technique:
Technique 7: Bat Wing Liner (For Hooded + Downturned Combo)
If you have both hooded AND downturned eyes, standard techniques fail twice — the wing droops because of the downturn and disappears because of the hood. Bat wing liner solves both problems. Popularized by celebrity MUA Katie Jane Hughes, this technique creates a wing that stays visible through the hood while lifting the outer corner.
Step-by-step:
- Line the upper lash line from inner corner to the outer third. Stop before the droop.
- With your eyes open, mark the wing tip. Place a small dot where you want the wing to end — above and beyond the outer corner, angled steeply toward the brow tail. The wing must sit above both the crease fold and the drooping corner.
- Close your eye. Draw a line from the wing tip down into the crease, connecting it to the liner on your lash line. Follow the curve of the crease. This creates a triangular or bat-wing shape.
- Fill in the shape. It will look dramatic and exaggerated with your eye closed — that is correct.
- Open your eye. The crease fold hides the middle section, and what remains visible is a clean, sharp, upward-angled wing that lifts the outer corner.
The key insight for downturned hooded eyes: Angle the wing tip even steeper than you would for hooded eyes alone. The downturn requires extra upward angle to compensate, so the wing tip may need to point almost vertically toward the brow.
Technique 8: Floating Liner (The Modern Lift)
Floating liner places eyeliner above the natural crease, on the visible part of the lid that neither the hood nor the downturn can reach. For downturned eyes, this creates the illusion of a larger, lifted eye area because the line sits higher than where the droop occurs — it is physically above the problem zone.
Step-by-step:
- Find your visible zone. With eyes open, look straight ahead. The area between your crease fold and your brow bone is where this liner will sit.
- Draw a thin line along the top edge of the crease fold — the line where the lid skin meets the visible area above. Follow the natural curve of your eye.
- At the outer edge, angle the line upward. Extend a short flick toward the brow tail. This is the lifting element — on downturned eyes, the upward flick at a high position creates maximum visual lift.
- Optional: tightline the upper lash line with a waterproof pencil to connect definition at the lashes with the floating line above. Or leave the lash line bare for a pure graphic effect.
Pro tip: Start with a dark eyeshadow on a small flat brush for a softer version. Graduate to liquid liner once you are comfortable with the placement. For downturned eyes, the outer tip of the floating line should angle noticeably upward — more than you might instinctively draw.
Watch floating and creative liner techniques:
Which Technique Is Right for You?
If you are a complete beginner with downturned eyes, start with tightlining. It is the easiest, most forgiving technique, and it creates definition without any visible line that can droop. Once you are comfortable with tightlining, try the outer-third wing or the smokey smudge — both deliver lift with minimal precision required. The full lifting wing and cat eye require the most skill but produce the most dramatic results.
For hooded and downturned eyes together, the bat wing liner is your best option. For a trending editorial look, floating liner bypasses the droop entirely by sitting above the crease.
Common Mistakes That Ruin Eyeliner on Downturned Eyes
"You should extend your eyeliner all the way to the outer corner of your eye before starting the wing."
Tap to revealOn downturned eyes, following the lash line to the very end of the outer corner drags the wing downward. Stop at the point where the slope begins and redirect upward from there. The wing should start before the droop, not after it.
"Dark liner all the way around the eye makes downturned eyes look more defined."
Tap to revealFully rimming the eye with dark liner shrinks it and drags it down. Dark liner on the outer lower lash line is especially damaging for downturned eyes because it emphasizes the very area where the corner drops. If you line the bottom, keep it to the inner third only.
"Thick eyeliner along the full upper lash line will make downturned eyes look more open."
Tap to revealThick liner along the entire upper lash line weighs down the eye and makes it look smaller. The weight of the liner pulls attention downward. Keep the line thin at the inner corner and only thicken at the outer third, where the thickness can be redirected into a lifting wing.
"Waterproof eyeliner is optional if you use a good primer."
Tap to revealDownturned eyes create friction at the outer corner where the upper and lower lids come closer together. This contact point breaks down non-waterproof formulas faster than other eye shapes. Primer helps, but waterproof or long-wear formulas are non-negotiable for downturned eyes — use both together.
Best Eyeliner Products for Downturned Eyes
The right formula matters as much as the right technique. Downturned eyes need fast-drying, smudge-proof products — especially at the outer corner where the skin naturally folds.
Why they work: Felt tips dry almost instantly, leaving a thin film that resists transfer. The rigid tip provides the precision needed to angle wings upward at the outer corner.
Best for: Lifting wing, cat eye, outer-third wing, floating liner. Any technique requiring crisp, thin lines.
Top picks: The NYX Epic Ink Liner has a flexible brush tip that is forgiving for beginners learning to redirect the wing angle. The Stila Stay All Day Waterproof Liquid Eyeliner has a stiffer felt tip for maximum precision. The Hourglass 1.5mm Mechanical Gel Liner has the thinnest tip of any gel liner, giving you surgical precision for angling wings upward.
Application tip: Wait 10-15 seconds after drawing the wing before opening your eyes fully. This gives the formula time to set so it does not transfer onto the drooping outer corner skin.
Why they work: Gel formulas give you a few seconds of working time to smudge and shape before they set. Once set, they lock in place — exactly what the smudge technique requires.
Best for: Smokey smudge technique, puppy liner, anyone who prefers a brush over a pen.
Top picks: The Bobbi Brown Long-Wear Gel Eyeliner is waterproof and does not budge once set. The Inglot AMC Eyeliner Gel is the same grade professionals use backstage at half the price.
Application tip: Use the e.l.f. Small Angled Brush with gel liner. A firm, short-bristled angled brush gives you the control to angle the smudge upward and away from the drooping corner.
Why they work: Pencils are the safest option for waterline and tightlining work — they are less irritating than liquids and easier to control in the tight space between lash roots.
Best for: Tightlining, lower waterline brightening, puppy liner, smudge base. Anywhere you need to get close to the eye itself.
Top picks: The Urban Decay 24/7 Glide-On Eye Pencil is the gold standard — creamy application that sets fully waterproof. For sensitive eyes, the IT Cosmetics Superhero No-Tug Gel Eyeliner has a tugging-free formula designed for delicate skin.
Critical note for downturned eyes: Pencil drawn on top of the upper lash line (not tightlined) is the most likely to transfer at the outer corner. If you use pencil on the upper lid, set it immediately by pressing a matching dark eyeshadow into the wet pencil with a flat brush.
Pro Tips That Take Your Liner from Good to Flawless
Curl your lashes aggressively. This is critical for downturned eyes because the lashes naturally point downward along with the outer corner. Use an eyelash curler before mascara and hold it for a full 10 seconds. Add extra mascara coats to the outer-corner lashes to create additional visual lift.
Use the concealer cleanup trick. After completing your liner, dip a small flat brush into concealer one to two shades lighter than your skin tone and trace along the bottom edge of the wing. This sharpens the line and amplifies the upward angle. On downturned eyes, this single step can double the lifting effect.
Try brown before black. Brown liner creates definition without heaviness. On downturned eyes, black liner at the outer corner can look severe and emphasize the downward slope. Dark brown or espresso shades produce a softer, more naturally lifted appearance. Save black for nights out.
Add outer-corner lash clusters. Three to four individual lash clusters placed at the outer corner create instant lift without full strip lashes. The added length and curl at the outer edge visually counteracts the downward slope.
Shape your brows for lift. On downturned eyes, brows do more heavy lifting than on any other eye shape. A well-arched brow creates an upward focal point that counterbalances the outer-corner slope — our eyebrow shapes guide covers which arch works best for your face shape.
Apply concealer 1-2 shades lighter directly under the wing's outer edge. It sharpens the angle and creates an optical lift that no technique alone can match. Think of it as contouring for your eye shape.
Test Your Downturned Eye Eyeliner IQ
5 questions. How well do you really know this stuff?
Frequently Asked Questions About Eyeliner for Downturned Eyes
Look straight into a mirror and imagine a horizontal line from the inner corner of your eye to the outer corner. If the outer corner falls below that line, you have downturned eyes. Downturned eyes give a naturally soft expression with the upper lash line curving gently downward at the outer edge.
For lifting, the modified wing with a steep upward angle is the most effective technique. For ease, tightlining gives natural definition with zero droop. For a soft look, the smokey smudge creates lift without precision. For embracing the downturned shape, puppy liner leans into it as a deliberate aesthetic. Start with tightlining if you are a beginner.
Absolutely — you just need to modify the angle. Stop the upper lash line liner before the outer corner starts to slope down, then redirect the wing upward at a steep 45-degree angle toward the brow tail. The wing must start before the droop, not at the end of it. Map the wing with your eyes open.
Yes. Hooded refers to how much of the eyelid is visible (a skin fold covers the crease). Downturned refers to the angle of the outer corner. These are independent traits. If you have both, try the bat wing eyeliner technique, which is designed to work through a hooded fold while lifting the outer corner.
Three principles create lift: stop your upper lash line liner before the outer corner droops, angle any wing steeply upward toward the brow tail, and apply concealer lighter than your skin under the wing edge to sharpen the angle. Avoid lining the outer lower lash line with dark liner, which pulls the eye further down.
It depends on the look you want. Puppy liner follows the natural downward curve, creating a soft, doe-eyed, youthful effect. Downturned eyes actually have an advantage for this look because the shape is already there. However, if your goal is to create visual lift, puppy liner will not do that — choose the lifting wing or cat eye instead.
The Bottom Line: Your Eyes, Your Rules
Downturned eyes are not a problem to fix — they are a shape to work with. Marilyn Monroe had them. Anne Hathaway has them. The difference between eyeliner that frustrates you and eyeliner that transforms you is one thing: knowing where to stop the line and where to redirect it. You now have eight techniques that do exactly that. Start with the easiest one — tightlining — and build from there. Once you internalize the three rules (stop before the droop, eyes open, always prime), every technique in this guide becomes doable.
Stop adapting your face to the tutorial. Adapt the technique to your eyes.