Bronzer is the single fastest way to make your face look alive — a few sweeps in the right places and you go from flat and one-dimensional to warm, glowing, and fresh off a vacation you never took. But apply it wrong, and you look muddy, orange, or like you rubbed dirt across your cheeks. The difference between a sun-kissed goddess and a bronzer disaster comes down to three things: the right shade, the right placement, and the right blending. This guide covers all three — plus the bronzer types that work best for your skin, the technique that professional makeup artists use on every face they touch, and every mistake that separates a natural glow from a streaky mess.
Bronzer vs. Contour: The Critical Difference
This is the most important distinction in face makeup, and getting it wrong is the number one reason bronzer looks bad. Bronzer and contour do completely different jobs, and using one in place of the other will always produce a muddy, unflattering result.
Bronzer adds warmth. It mimics the warm, golden glow that sunlight leaves on your skin. It goes on the high points of your face — the places the sun would naturally hit — and its undertone is warm: golden, peachy, amber, or bronze. The goal is to make you look sun-kissed, healthy, and radiant.
Contour creates shadow. It mimics the cool, dark shadows that naturally occur under your cheekbones, along your jawline, and at your temples. Contour shades are cooler, more muted, and ashier than bronzer. The goal is to sculpt and reshape your bone structure. For a deep dive into sculpting technique, our full contouring tutorial covers every face shape and method.
The test: Hold your bronzer next to your contour product. If they look similar, one of them is wrong. Bronzer should read warm and glowy. Contour should read cool and shadowy. They belong in different zones on your face and serve different purposes entirely.
Understanding this trio is how professional makeup artists build a three-dimensional face. If you want to add highlighter on top of your bronzer for maximum glow, the combination is stunning — but each product must go in its designated zone.
Types of Bronzer: Powder, Cream, and Liquid
The formula you choose matters more than the brand name on the compact. Each type has strengths and weaknesses, and the right choice depends on your skin type and the finish you want.
Powder Bronzer
The most popular and beginner-friendly format. Powder bronzer is buildable, forgiving, and easy to blend with a fluffy brush. It gives you the most control — you can start sheer and build intensity gradually without streaking. The texture sits on top of the skin and delivers a matte or soft-shimmer finish depending on the formula. Best for oily and combination skin because it absorbs excess oil rather than sliding around. The tradeoff: powder can emphasize dry patches, fine lines, and texture if you skip moisturizer or over-apply.
The Physicians Formula Butter Bronzer is one of the most beloved drugstore bronzers ever made — the ultra-soft, buttery formula blends like a dream and smells like a tropical vacation. For a matte option, the Too Faced Chocolate Soleil Matte Bronzer delivers a velvet-smooth finish infused with real cocoa powder that photographs beautifully. And for prestige, the Charlotte Tilbury Airbrush Bronzer has a finely milled, skin-blurring texture that creates the most natural, diffused warmth of any powder bronzer on the market.
Cream Bronzer
Melts into the skin for the most natural, lit-from-within warmth. Cream bronzer blends seamlessly and gives a dewy, skin-like finish that looks less like makeup and more like actual sun exposure. It works beautifully under foundation (the underpainting technique) or on top of it. Best for dry to normal skin because the emollient formula adds moisture rather than absorbing it. The tradeoff: cream can slide on oily skin and needs to be set with powder for longevity.
The e.l.f. Putty Bronzer is an extraordinary value — the creamy putty-to-powder formula infused with argan oil delivers a blendable, long-lasting bronze for under ten dollars. For a stick format, the Milk Makeup Matte Bronzer Stick glides on with zero effort and offers over a thousand swipes per stick. And for sheer buildable warmth, the Too Faced Chocolate Soleil Melting Bronzing Stick delivers a lightweight satin finish that blends into the skin effortlessly.
Liquid Bronzer
The newest and most versatile format. Liquid bronzer can be mixed into your moisturizer or foundation for an all-over glow, or applied directly to specific areas for targeted warmth. It gives the most seamless, second-skin finish of any format and is virtually impossible to over-apply because the formula is so sheer. Best for all skin types depending on the formula. The tradeoff: liquid bronzer offers less control than powder and requires quick blending before it sets.
The Physicians Formula Butter Glow Liquid Bronzer extends the beloved Butter Bronzer line into liquid form with the same tropical scent and skin-loving formula. For a high-end option, the Milk Makeup Bionic Bronzer delivers a weightless, hydrating liquid bronze that can be sheered out or built up for a customizable glow.
Powder Bronzer
Most forgiving format. Buildable coverage, easy to blend with a fluffy brush, and hard to over-apply. Works best on oily and combination skin. Can emphasize dry patches if over-applied on dry skin.
Cream Bronzer
Melts into skin for a dewy, sun-kissed look that mimics real sun exposure. Best for dry to normal skin. Apply with fingers, a sponge, or a dense brush. Must be set with powder for all-day wear.
Liquid Bronzer
Mix into moisturizer for an all-over glow or apply directly for targeted warmth. The most seamless, second-skin finish. Works for all skin types. Requires quick blending before the formula sets.
The 3-E Technique: How to Apply Bronzer Step by Step
This is the method that professional makeup artists use because it is fast, foolproof, and mimics exactly where the sun naturally hits your face. The 3 E's stand for: Forehead (where the sun hits first), Ears (along the cheekbones and temples), and Everywhere the sun touches (jawline, nose, neck). Think of it as painting sunlight onto your skin.
Step 1: Prep and base. Apply your skincare, primer, and foundation as normal. Bronzer goes on after your base — it is one of the last face products you apply, before highlighter and setting spray. If you are using a matte foundation, bronzer adds back the warmth and dimension that matte formulas can flatten.
Step 2: Load your brush lightly. Dip your brush into the bronzer, then tap off the excess. This is critical — you can always add more, but removing too much bronzer requires starting over. For powder, swirl a large fluffy brush into the pan and tap the handle against your palm. For cream, pick up a small amount on a dense brush or your fingertips.
Step 3: Forehead (the first E). Sweep bronzer along your hairline in a curved motion from one temple to the other. Concentrate the product at the edges near the hairline and blend inward — the center of your forehead should have the least product. This mimics how the sun hits the top of your face, leaving the recessed center lighter.
Step 4: Ears and cheekbones (the second E). Starting at each ear, sweep bronzer along the tops of your cheekbones — not in the hollows underneath (that is contour territory). The top of the cheekbone is where the sun naturally hits, creating a warm, lifted glow. Blend forward toward the apples of your cheeks but stop before the center of your face.
Step 5: Everywhere the sun touches (the third E). Lightly dust bronzer along your jawline, down the bridge of your nose, and on the tip of your chin. Then — and this is the step most people skip — apply a touch of bronzer to your neck and ears. Nothing ruins a bronzer application faster than a warm, glowing face sitting on top of a pale neck.
Step 6: Blend everything. Using a clean fluffy brush or a damp beauty sponge, blend all edges until there are no visible lines. The bronzer should look like a seamless gradient — warmest at the perimeter of your face, softest in the center. Make sure your brushes are clean for the best result — dirty tools create streaks and muddy the color. Here is how to clean your makeup brushes properly.
The distinction is placement, not product. Bronzer goes on the high points. Contour goes in the hollows. Mixing up the zones is the single biggest bronzer mistake.
Watch how the pros apply bronzer — placement, blending, and the finished result:
Bronzer Placement by Face Shape
The 3-E technique works universally, but adjusting your placement slightly based on your face shape takes the result from good to perfect. The principle is simple: add warmth to the areas you want to visually advance, and skip the areas you want to recede.
The goal: Create the illusion of length and definition. Round faces have similar width and length with soft, curved features.
Forehead: Concentrate bronzer along the temples and the very top of the hairline, avoiding the center. This narrows the forehead and adds vertical dimension.
Cheekbones: Sweep bronzer along the tops of your cheekbones at a slightly more diagonal angle — angling upward toward the temples. This creates a lifting, elongating effect.
Jawline: Apply lightly along the sides of the jaw to add subtle definition. Skip heavy bronzer on the chin — it adds width.
Pro tip: Pair your bronzer with a [contour](/article/how-to-contour-face) in the hollows below the cheekbones. Bronzer on top plus contour below creates maximum dimension on round faces.
The goal: Enhance what is already balanced. Oval faces are naturally proportionate with a slightly wider forehead and a gentle taper at the jawline.
Standard 3-E placement: The basic technique works perfectly on oval faces. Sweep across the hairline, along the cheekbones from the ears, and lightly on the jawline, nose, and chin.
Keep it simple: Oval faces need the least adjustment. Focus on even, well-blended warmth rather than strategic reshaping.
Pro tip: Oval faces look especially stunning with a dewy cream bronzer — the balanced proportions let a natural, radiant finish shine without needing structural correction.
The goal: Soften the strong angular features. Square faces have a prominent jawline with the forehead, cheekbones, and jaw at roughly equal width.
Forehead: Apply bronzer to the outer corners of the forehead and blend inward. Avoid the center — warmth at the edges softens the squared-off appearance.
Cheekbones: Sweep in a rounded, curved motion rather than a straight horizontal line. Curved strokes work against the angular bone structure for a softer effect.
Jawline: Focus bronzer on the corners of the jaw specifically, blending upward and inward. This rounds out the most angular points.
Pro tip: Use a large, fluffy brush and apply in circular motions. Avoid any sharp, angular application — you want to soften, not define.
The goal: Balance the wider forehead with the narrower chin. Heart-shaped faces have a broad forehead, prominent cheekbones, and a pointed chin.
Forehead: Apply bronzer generously along the temples and hairline to visually narrow the wider upper face. This is your key adjustment zone.
Cheekbones: Standard placement — sweep from the ears along the tops of the cheekbones. Keep it soft and well-blended.
Chin: Add a touch of bronzer to the tip of the chin and along the narrow jawline. This adds warmth and visual weight to the lower face, balancing it with the broader forehead.
Pro tip: Pair with [highlighter on the chin](/article/how-to-highlight-face) to draw light and attention to the lower face, creating balance from both warmth and reflection.
The goal: Visually shorten the face and add width. Long faces are significantly taller than they are wide.
Forehead: Apply bronzer across the entire hairline — top and sides — to visually shorten the upper face. Blend downward toward the center of the forehead.
Cheekbones: Sweep in a more horizontal direction than diagonal. Horizontal warmth adds visual width, which is exactly what a long face needs.
Chin: Apply bronzer to the tip of the chin to visually shorten the lower face. This creates a "frame" of warmth at the top and bottom that compresses the perceived length.
Pro tip: Skip heavy bronzer on the nose bridge — a highlighted nose creates a vertical line that elongates the face further. Keep warmth concentrated on the horizontal planes.
Choosing the Right Bronzer Shade for Your Skin Tone
The wrong shade is what turns a sun-kissed glow into an orange mask. The golden rule: your bronzer should be one to two shades darker than your natural skin tone with a warm undertone that complements your complexion. If you are not sure about your undertone, our guide on how to find your skin undertone walks through every reliable method.
Fair Skin
Choose a light golden or peach-toned bronzer. Avoid anything that reads orange, dark brown, or heavily pigmented — fair skin shows bronzer more dramatically than any other tone, so subtlety is essential. The Physicians Formula Butter Bronzer in Light Bronzer is specifically designed for fair complexions with a soft, buildable warmth that never looks harsh. The shade "Fair" in the Charlotte Tilbury Airbrush Bronzer range is another excellent match.
The test: Swatch the bronzer on your jawline. If it disappears into your skin with a subtle warmth, it is right. If you can see a distinct color change, it is too dark.
Medium Skin
You have the widest range of bronzer shades to work with. Golden, amber, and warm caramel tones all work beautifully on medium skin. This is the tone that most bronzers are formulated for, so the majority of "universal" shades will flatter you. The NARS Laguna Bronzing Powder is the industry classic — it has been the bestselling bronzer in the world for over two decades because it works flawlessly on light-to-medium and medium skin tones.
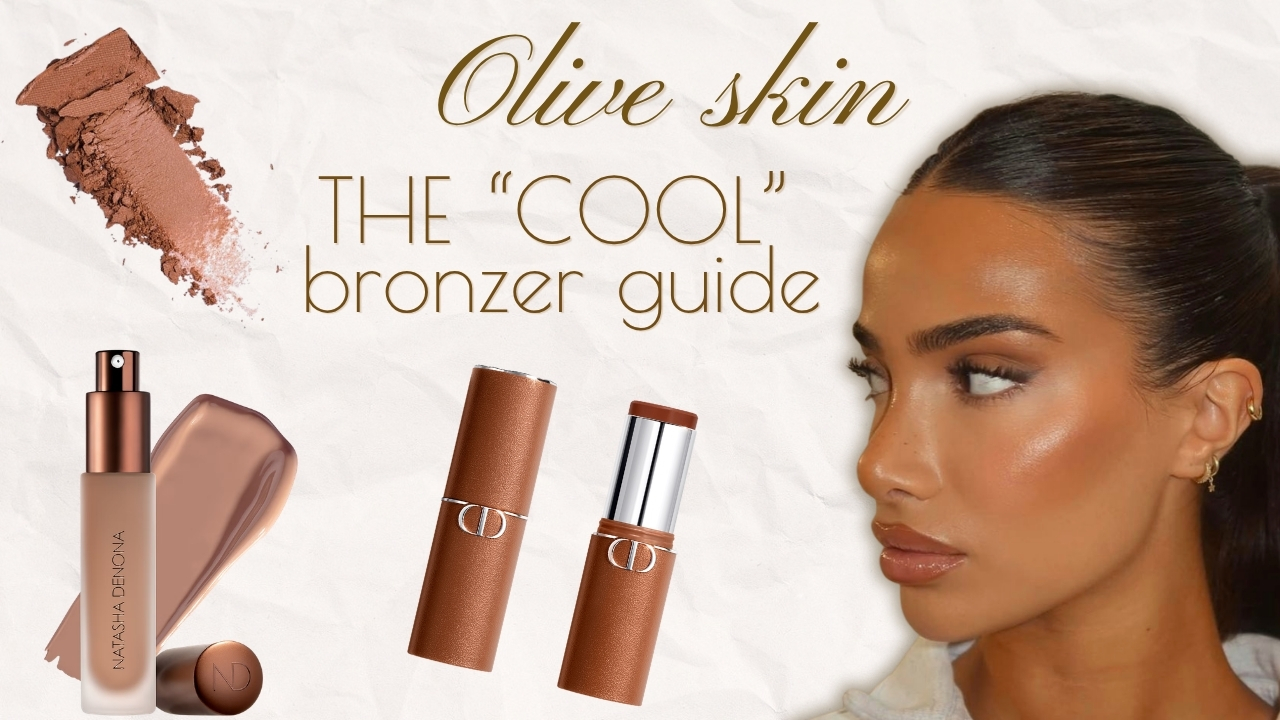
Olive Skin
Look for bronzers with warm golden or amber undertones — avoid anything too pink or too orange, as both can clash with olive undertones. A bronzer with a hint of green-gold or yellow-gold will harmonize with your natural skin tone rather than fighting it. Try using our shade matcher to find bronzer shades that complement olive undertones specifically.
Tan to Deep Skin
Rich amber, deep bronze, warm terracotta, and dark chocolate tones look stunning on tan to deep skin. Skip anything with a gray or ashy undertone — it will look chalky and dull. The key is choosing a bronzer with enough warmth and depth to actually show up on your skin tone without looking like a stripe. The Benefit Hoola Bronzer in the deeper shades delivers a rich, matte warmth that sculpts beautifully. For the deepest skin tones, the Benefit Hoola Bronzer in Toasted provides a warm, deep bronze with zero ashiness.
This rule prevents the most common bronzer mistake across all skin tones. When in doubt, go lighter — you can always build up, but you cannot take away.
Application Tools: Brushes, Sponges, and Fingers
The tool you use matters almost as much as the product itself. The wrong brush can turn a beautiful bronzer into a streaky mess.
For Powder Bronzer
A large, fluffy brush is non-negotiable. You want something big enough to deposit a diffused wash of color rather than a concentrated stripe. The Real Techniques Powder Brush is the gold standard at under ten dollars — the ultra-plush bristles pick up just the right amount of product and blend it seamlessly. For more control, an angled brush lets you target the hollows and cheekbones more precisely without overdoing it.
For Cream Bronzer
Three options work well. A dense, flat-top brush buffs cream bronzer into the skin with a stippling motion for a seamless finish. A damp beauty sponge blends cream beautifully and gives the most natural, skin-like result. Your fingers — the warmth of your fingertips melts cream bronzer into your skin for the most effortless application. For beginners, fingers are actually the easiest and most foolproof tool for cream bronzer.
For Liquid Bronzer
Your fingers or a damp sponge work best. Liquid bronzer sets quickly, so you need a tool that blends fast. Apply a few drops to the back of your hand, then dab onto your face with your fingertips and blend immediately. Alternatively, mix two to three drops into your moisturizer or foundation before applying for an all-over, sheer bronze glow.
The Best Bronzers at Every Price Point
Every bronzer here earns its spot through real-world testing across skin types and tones.
The cult-classic drugstore bronzer with an ultra-soft, buttery formula infused with murumuru butter. Delivers a natural, buildable warmth with a subtle luminous finish.
Creamy putty-to-powder formula infused with argan oil. Blends beautifully, lasts all day, and costs under ten dollars. Unbeatable value.
Velvet-smooth matte finish infused with real cocoa powder. Zero shimmer, zero glitter — just a clean, sculpted warmth that photographs beautifully.
The bestselling bronzer in the world for a reason. Talc-free, finely milled, with a warm golden shimmer that flatters virtually every skin tone.
Swipe-and-blend convenience with a buildable matte finish. Formulated with mango butter and apricot oil for a hydrating, cruelty-free bronze.
Finely milled, skin-blurring formula that creates the most airbrushed, diffused warmth of any bronzer on the market. Available in nine shades from fair to deep.
Common Bronzer Mistakes (and How to Fix Them)
These are the mistakes that separate a beautiful sun-kissed glow from a muddy, orange disaster. Every one of them is fixable.
"You should apply bronzer in the hollows of your cheeks."
Tap to revealThe hollows of your cheeks are contour territory — they are the areas that naturally sit in shadow. Bronzer belongs on the tops of your cheekbones, where the sun naturally hits. Putting warm bronzer in the hollows creates a muddy, orange stripe instead of a sculpted shadow. Use a cool-toned contour there instead.
"You should also apply bronzer to your neck and ears."
Tap to revealThis is one of the most important steps that beginners skip. If your face is warm and bronzed but your neck and ears are pale, the mismatch looks unnatural and obvious. A light dusting of bronzer on the neck, ears, and even the decolletage creates a seamless, cohesive glow that looks believable.
"Bronzer and contour are basically the same product."
Tap to revealThey serve entirely different purposes. Bronzer is warm-toned and adds a sun-kissed glow to the high points of the face. Contour is cool-toned and creates shadow to sculpt bone structure. Using bronzer as contour produces muddy, orange results. Using contour as bronzer produces an ashy, lifeless face. They are two different products for two different jobs.
"Fair skin cannot wear bronzer."
Tap to revealFair skin absolutely can wear bronzer — but the shade selection is critical. Fair complexions need a light, peachy-golden bronzer that is only one shade darker than the natural skin tone. Heavy, deep bronze shades will look unnatural, but a soft, sheer wash of warmth adds a healthy glow to fair skin that looks beautiful and believable.
Beyond these myths, three additional mistakes to watch for: applying bronzer to the center of your face (warmth belongs at the perimeter — the hairline, cheekbones, and jawline — not the center of the forehead or nose tip in large amounts), skipping moisturizer before powder bronzer (dry skin plus powder equals a patchy, flaky mess), and using a brush that is too small (a tiny brush concentrates product and creates visible stripes instead of a diffused, natural glow).
Bronzer Tips for Every Skin Tone
Getting bronzer right across the full spectrum of skin tones requires understanding one principle: the purpose of bronzer is always to add warmth and glow, regardless of how light or deep your complexion is. The shade and formula change, but the goal stays the same.
Start with the lightest bronzer in any range and apply with an extremely light hand. Build gradually — one sweep is often enough. Look for shades described as "light," "fair," or "peach." Matte formulas are more forgiving than shimmery ones on fair skin because visible shimmer particles can read as glitter rather than glow. If your bronzer has shimmer, apply it only to the cheekbones.
Medium skin tones have the most flexibility with bronzer shades. Golden, caramel, and warm honey tones all work beautifully. You can go slightly deeper — up to two shades darker — without it looking unnatural. Both matte and shimmer finishes photograph well on medium skin. This is the tone where cream bronzers really shine, giving that effortless "just came back from vacation" effect.
Deep skin tones look incredible with rich, warm bronzers in shades of amber, dark bronze, warm terracotta, and deep chocolate. Avoid anything with a gray or ashy undertone — it will look chalky and dull on deep skin. Shimmer and satin finishes are especially gorgeous because they catch light and create a luminous, multi-dimensional warmth. Check ingredients with our ingredient decoder to find clean formulas that work for your skin.
Watch bronzer application techniques for different skin tones:
Frequently Asked Questions About Bronzer
Apply bronzer to the high points where the sun naturally hits: along the hairline across the forehead, on the tops of the cheekbones (not in the hollows — that is contour territory), along the jawline, down the bridge of the nose, and on the tip of the chin. Also apply lightly to your neck and ears for a seamless, cohesive glow.
Bronzer is warm-toned and adds a sun-kissed glow to the high points of your face — it mimics sunlight. Contour is cool-toned and creates shadow in the hollows and recesses of your face — it mimics shade. They go in different zones and serve completely different purposes. Using bronzer as contour creates a muddy, orange result.
It depends on your skin type. Powder bronzer is better for oily and combination skin — it absorbs oil and is the most buildable and forgiving format for beginners. Cream bronzer is better for dry to normal skin — it melts into the skin for the most natural, dewy finish. Liquid bronzer works for all skin types and can be mixed into moisturizer for a sheer all-over glow.
Absolutely. Fair skin needs a bronzer that is only one shade darker than your natural skin tone in a soft peach or light golden shade. Apply with a light hand and build gradually. Avoid deep, heavily pigmented bronzers — they will look unnatural on pale complexions. A sheer wash of warmth adds a healthy, believable glow to fair skin.
Bronzer goes on first, then blush. Bronzer establishes the overall warmth and structure of your face, and blush adds a pop of color on top. Applying blush first and then bronzer over it can muddy the blush color and make both products look less defined. The standard order is: foundation, contour, bronzer, blush, highlighter, setting spray.
Choose a bronzer that is one to two shades darker than your natural skin tone with a warm undertone. Swatch it on your jawline — if it blends in with a subtle warmth, it is the right shade. If you can see a visible color change, it is too dark. Fair skin needs light peach or golden tones, medium skin works with caramel and amber, and deep skin looks best in rich bronze, terracotta, and chocolate.
The Bottom Line: Warmth Where the Sun Would Be
Bronzer is not complicated once you understand one principle: put it where the sun would naturally hit your face. The forehead along the hairline, the tops of the cheekbones, the bridge of the nose, the jawline, the chin — these are your warmth zones. Everything else is contour, blush, or highlight territory.
Start with the 3-E technique if you are new. Choose a shade that is only one to two shades deeper than your skin. Use a big, fluffy brush for powder or your fingertips for cream. Blend until there are no edges. And always, always bring the warmth down to your neck and ears — a bronzed face on a pale neck is the fastest way to ruin an otherwise beautiful application.
The best bronzer application is the one nobody notices as makeup. They just think you look warm, healthy, and glowing — like you spent the weekend somewhere beautiful.
Sweep where the sun hits. Blend until it disappears. Glow like you mean it.